Wednesday, January 31, 2018

Herbal Honey Recipes

Herbal honey can be used to treat common ailments or simply for the pleasure of its wonderful flavor.

If you enjoy herbs and honey, infusing your honey with herbs will give you the best of both worlds. Honey and herbs are both well known for their natural medicinal value. Honey is anti-bacterial, prevents infection and inflammation, and soothes a sore throat. Herbs have individual medicinal benefits. Herbal honey can be used to treat common ailments or simply for the pleasure of its wonderful flavor. It is best to use raw honey in your herbal infusion because raw honey is richer in enzymes, as the heat from pasteurization destroys them, as well as some of the active antibacterial ingredients.
To Make Herbal Honey
  1. Use 1 tablespoon of fresh herbs, or half a teaspoon of dried herbs for every 2 cups of honey.
  2. If the herbs are fresh, grind them well to aid in the infusion.
  3. Tie the herbs in cheesecloth.
  4. In a pot, warm the honey and herbs. It is important not to heat the honey too much or the enzymes will be destroyed. Simply warm the honey to a temperature well below 115 degrees.
  5. Put the honey and the herbs into a large canning jar with a tight fitting lid.
  6. Let the honey sit in at room temperature in a dark place for at least one week.
  7. Heat the honey just to warm and press the liquid out of the herbs.
Tips for Making Herbal Honey:
  • You can also chop the herbs finely and leave the herbs in the honey.
  • Using more herbs will shorten the amount of time it takes to infuse the honey.
  • Allowing the herbs to infuse into the honey longer will strengthen the medicinal properties of the herbal honey.
Commonly used Herbs for Infusing Honey and Their Medicinal Value:
  • Cayenne Pepper: Aches & Pains, Arthritis, Cough, Digestion/Indigestion, Fibromyalgia, Gout, Headache, Heart Tonic, IBS, Lupus
  • Chamomile: Anxiety, Burns, Candida, Depression, Digestion, Eczema, Female Tonic, Gingivitis, IBS, Insomnia, Stress, Toothache
  • Cinnamon: Candida, Colds, Diabetes, Digestion, Fungus Infections, IBS, Flu. Nausea
  • Dandelion: Alcoholism, Bladder Infection, Memory/Focus, Bronchitis, Cholesterol Control, Colds, Digestion, Female Tonics, IBS, Liver, Respiratory, Osteoporosis, PMS
  • Fennel: Arthritis, Congestion, Cough, Digestion, Gout, Lupus, Menopause, Weight Loss
  • Garlic: Allergies, Asthma, Bronchitis, Burns, Cancer, Candida, Cholesterol, Colds, Fungus, Heart Tonics, Herpes, Flu, Respiratory, Sinusitis, Sore Throat *Honey Infused with Garlic makes an excellent sore throat remedy!
  • Ginger: Arthritis, Cholesterol, Colds, Digestion, Fibromyalgia, Gout, Heart Tonic, IBS, Lupus, Nausea
  • Lavender: Anxiety, Arthritis, Burns, Candida, Colds, Depression, Fibromyalgia, Gout, Headache, Hypertension, IBS, Insomnia, Lupus, Nausea
  • Lemon Balm: Colds, Depression, Heart Tonics, Herpes, Nausea, Sore Throat and Laryngitis
  • Peppermint: Allergies, Anxiety, Bronchitis, Chronic Fatigue, Colds, Congestion, Cough, Headache, Heart Tonics, IBS, Flu, Respiratory, Nausea, Sinus
  • Rosemary: Anxiety, Arthritis, Asthma, Memory, Bronchitis, Cholesterol, Chronic Fatigue, Colds, Gout, Heart Tonics, IBS, Respiratory, Lupus
  • Sage: Memory, Menopause
  • Thyme: Congestion, Cough, Respiratory, Toothache
Copyright HS Schulte

Wednesday, December 27, 2017

Baby Bottle Cover Pattern for the Knifty Knitter Looms

Knifty Knitter Baby Bottle Cover Pattern
Knifty Knitter Flower Loom
Medium Weight Yarn
Yarn Needle
Crochet Hook

Note: Crochet skills are needed for this project.
  1. Use the two-over-two stitch to knit in a spiral around the flower loom for 22 rows.
  2. Sew through each loop to remove it from the flower loom.
  3. Chain 40 to create a long cord. 
  4. Feed the cord through the top loops of the bottle cover.
  5. Tie the cord in a bow.
  6. Sew through the bottom looms and pull them tightly to cinch the bottom closed.
  7. You can also use small pom poms or felt to decorate the cover.

Making Shrinky Dinks with Kids

We used the Shrink It! Jewelry Baking Kit by ArtSkills. We got it at Dollar General just before
Christmas on sale and it was only a dollar or two.

The kit comes with the plastic shrinky dink pictures with a paper type coating on them that was not there when I was a kid in the 70s. The white paper coating makes it easier to color them. Have the kids use the colored pencils that come in the kit to color the pictures. Then have them cut out the pictures and punch a hole to put the loops through and string them on necklaces, key chains, jewelry, hair clips, or anything they wish. Skills developed include coloring, cutting, and crafting jewelry. It's a great craft for kids that are practicing these skills or older girls that want to make their own jewelry. It's inexpensive too.


The kit comes with parchment paper to line the pan and keep it from sticking. Heat the oven to 350 degrees and place the pan with the paper lining and shrink its in the oven for 1 minute. The final shrink its come out only about 1/10th the size of the original. 

Knifty Knitter Hat Pattern

If you've never made a hat on the Knifty Knitter looms, this is a good pattern to get started. It teaches the basic method of making a hat. The loom that you use to make this hat will depend on the size hat you want. I knit hats for myself and my teens on the green loom. Some adults prefer to use the yellow loom for a bigger hat.

Using 2 worsted weight yarns (typical yarn weight) held together as one yarn, wrap the loom one time around. If you haven't e wrapped before, here is a video to get you started.


Push the first row down to the bottom of the pegs and wrap a second row. As you wrap be sure to wrap loosely! Wrapping too tight will make the next step difficult.

Knit! You create knit by using the hook that came with your Knifty Knitter looms to pull the bottom loop up and over the loop above it, then off the peg. Do this with all the pegs until you have only one loop left on each peg.

Wrap again. Knit again. Continue wrapping a row and knitting a row, until you've knitted 30 rows.

Remove the knit from the loom by cutting a one foot tail of the working yarn. Thread the end through a yarn needle and sew through each loop with a yarn needle. In this step you want to be sure that you go the same direction that you've been working, so as not to reverse the direction of the yarn.

When you have the loops off the pegs, pull the yarn tight to cinch the knit together. This is the top of the hat. The bottom of the hat will naturally roll.


Tuesday, December 26, 2017

Bumble Bee Hat

Knifty Knitter Bee Hat
Instructions:

1. Using one strand each of the 2 black yarns, wrap all of the pegs and knit 7 rows. Put the first row back up and over the pegs as if you were making a brim. Knit the stitches over.
2. Switch to the yellow yarn, but do not cut the black yarns. Using 2 strands of the yellow yarn, knit 4 rows.
3. Switch back to the black yarns, but do not cut the yellow yarn. Knit 7 rows using the black yarns.
4. Reach inside of the loom and pull the first row of the black knitting up and over the pegs, as if you were making a brim. Knit this row over.
5. Repeat steps 2 through 4 two more times. This makes 4 bumps, or ridges.
6. Knit 10 rows using the yellow yarn.
7. Using a yarn needle and a 14" piece of yarn, take the yarn loops from the pegs. Gather the two ends of your sewing yarn together and tie them in a square knot. (This process is described in detail in the basic hat instructions in the round loom packaging.)
What you will need:

Provo Craft Supplies
  • Ex-large Knifty Knitter Round Loom
  • Hook
Other Supplies
  • One skein of Fun Fur in black
  • One skein of black knitting worsted weight
  • One skein of bright yellow knitting worsted weight

Hat with Vertical Stripes

Knifty Knitter Vertical Striped hat

You Will Need:
  • Red Heart Yarn
  • Crochet Hook
  • Round Knifty Knitter Loom (Various sizes depending on the age and head size)
    Knifty Knitter Hat with Vertical Stripes
  1. The hat is knitted from the top down. Ewrap all the odd number pegs: 1, 3, 5, 7, etc. Knit using the one over one stitch (pull one loop over one loop).
  2. Using a second yarn color, ewrap the even number pegs: 2, 4, 6, 8, etc. Knit using the one over one stitch.
  3. Continue with steps 1 and 2 until the knit is 7 inches long. Always wrap the pegs with the same color used in the previous row.
  4. Using the color that you would like for the brim of the hat, create a ribbed brim by alternating ewrap and purl as you knit around the loom for 10 rows. 
  5. Remove the hat from the loom by loosely crocheting once through each stitch as you remove it from the loom. Add a loose chain stitch between each of the loops.
  6. Sew through each loop at the top of the knit to pull closed the top of the hat.  
Knifty Knitter Hat
As an alternative method, Jeannette also reversed the pattern knitting it from bottom to top. This prevented the brim from becoming too tight at the cast off. Here is the version of the hat knitted from bottom to top.


How to Knit a Scarf with Vertical Stripes

Poncho

Knifty Knitter Poncho
Instructions
1. Small women size or child 10 or 12
2 .Take a pigment ink pen and mark the ends of the pegs. Start by numbering the pegs clock-wise the pegs from the holding peg on the side. 1 to 41.
3. Wrap the yarn around the holding peg on the side of the loom. Wrap the pegs 1 and 2 and turn and wrap back to the peg number 41. Knit the peg 1 and wrap around 2 and 3 pegs.
4. Continue going back and forth knitting until you have added a stitch each end and have all of the pegs wrapped except the middle peg (number 22).
5. Knit even on these pegs for 15 rows.
6. SPLIT
7. Knit to the peg 41 and turn back and knit to peg 23. Continue on knitting on these pegs for 15" or 46 rows. Cut yarn and leave a 6 or 8" tail.
8. Using the new ball of yarn attach to the loops on the pegs numbered 1 to 21 and knit to the same length as the other side. (15" or 46 rows)
9. BACK SIDE
10. Start knitting the two pieces together again and knit 24 rows. Start to take one stitch off at the start of each row. Knit to the end loop around the last peg, and knit the next 3 stitches.
11. Using the crochet hook take the first loop of the peg and run the loop from the second peg through the first loop. Now put this loop back on the end peg.
12. Continue to the end of the row and knit back 3 stitches and decrease the end stitch. Continue to the end of the point.
13. FINISH Cut 9" pieces of yarn and tie or loop 3 pieces of yarn in between each of the knitted rows. Crochet a simple chain 24" long and tie in the front.

What you will need:
Provo Craft Supplies
Other Supplies

  • Crochet hook size G or H


  • skeins of Jiffy® Quick and Easy mohair look yarn by Lion Brand® Yarn
  •  

    Big Shawl

    Knifty Knitter Shawl
    Instructions
    1. Using the extra large loom and one strand of the Italian yarn, e wrap the first 3 pegs and knit on these 3 pegs until you have a 12" long tie.
    2. Wrap the rest of the loom, skipping every other peg. Knit on all of the loom stitches until the piece measures 43".
    3. Bind off the stitches so that you have the opposite side of the knitting to do a tie for the other side. Sew up as the diagram shows and add 5" fringe.
    What you will need:
    Provo Craft Supplies
    Other Supplies
    • Crochet hook (large)
    • 5 skeins of Kitty Italian Fashion Accent yarn
    • 1 skein Lion Brand Yarn, Micro Spun, in bright blue

    Square Throw Pillow

    Knifty Knitter Throw Pillow
    Throw pillow knitted by Joan Toczek. She loomed this beautifully using Kids Red heart yarn in the color "Playful" and also used a strand of Lion Brand Fun fur.

    The original pattern for this throw pillow is from the pattern booklet published by Provo Craft, "Knitting with the Knifty Knitter II." This pattern makes a 14 x 14 inch throw pillow for dressing up your couch or decorating your bedroom.

    You will need:
    • Green Round Knifty Knitter Loom 
    • Red Heart Kid's Yarn (2 skeins, or 1 skein and fun fur yarn)
      Knifty Knitter Pillow Instructions
    1. Holding to yarns together, wrap the loom all the way around. Then, turn and wrap back to the first peg.
    2. Knit.
    3. Wrap again, continue wrapping and knitting until you've knitted 60 rows.  
    4. Cast off and you have a square piece of knit. 
    5. Cut 2 pieces of fabric 14.5 x 14.5 inches
    6. Pin knit to one piece of fabric. Sew knit to the fabric. 
    7. Sandwich the knit between the two pieces of fabric. (The right sides of the fabric should be facing the knit.)
    8. Sew a 1/2 inch seam around the perimeter of the fabric. (Leave a small opening to turn the pillow.)
    9. Turn the pillow right side out. 
    10. Stuff with polyfill
    11. Hand stitch the pillow closed.

    Loom Knit Potholder

    This is a good first project for new loom knitters, because it is quick and easy. It will help to enforce the basic steps of loom knitting. The pot holders also make nice gifts. The pattern uses the no wrap (flat stockinette) stitch knitted as a spiral continuously around the pink loom. This spiral knitting creates a tube of knit. Before you remove the knit from the loom, pull the bottom up and sew through the loops to sew it closed from the inside. Then push the knit back down through the center of the loom and bind off the top of the pot holder. You could also used plarn, or recycled plastic yarn, to make a potholder.

    What you'll need:
    • Pink long Knifty Knitter loom
    • 1 skein multi-color medium weight yarn
    • yarn needle
    • Knifty Knitter hook
    • Crochet hook
    1. E wrap around the loom once.
    2. Working in a continuous spiral around the loom, knit 40 rows using the no wrap stitch.
    3. Reach down through the middle of the loom and pull up the bottom. Using a yarn needle and spare yarn, sew the bottom together. Push the bottom back into the loom.
    4. Cast off using the crochet cast off by following the path of the yarn.
    5. Using a crochet hook, crochet the top of the pot holder together using a slip stitch, or single crochet stitch.
    6. When you are finished, chain a small loop for hanging the pot holder.
      Typically, I prefer yarns made from natural fibers, but this is one project that I would definitely recommend yarn from a synthetic fiber, such as polyester, or acrylic. Natural fibers "breathe" and conduct heat more readily. Synthetic fibers are better at blocking the heat and keeping it away from your hands and table tops.

      Loom Knit Leg Warmers

      Knifty Knitter Leg Warmers
      A 10 inch long loom is used in this pattern. For the Knifty Knitter loom set, this is the pink long loom. The 10 inch long loom from another set may be substituted. 

      The e wrap is used to knit back and forth to create a flat panel of knit. Change the color of the yarn after every 4 rows to create striped leg warmers. After the panel is removed from the loom, it is sewn together. 

      For a teen, you can use the pink long loom, wrap all 26 pegs and knit in a circular pattern to create tube knit, rather than flat panel knit. This is a variation of a pattern originally published by Provo Craft. The red round loom can also be used to knit these leg warmers. (I prefer the red round loom because you don't get the gap in the knit when knitting around  around the ends of the long looms.)


      1. Holding 2 strands yarn as if they are one, cast on by e wrapping the loom one time.
      2. E wrap the loom a second time.
      3. Knit 4 rows. 
      4. Change the color to 2 strands of red yarn and knit 4 more rows.
      5. Change the color to grey and repeat alternating 4 rows of each color until you've knitted 7 red stripes and 8 grey stripes, you will have grey on the loom. Continue on with the 4 more grey rows, for a total of 8 rows to make the grey band.
      8. Cast off the loom, by sewing through each loop. (Don't use a crochet cast on or off. It makes the ends to tight to stretch when the leg warmers are put on.)
      9. Cut the working yarn to about 24 inches. Turn the grey band under (toward the side of the knit you don't want showing outward). Whip stitch it down to form a cuff.
      10. Also with the side of the knit you don't want showing facing outward, sew a seam up the side of the knit.
      11. Cut the working yarn and tie a square knot.
      12. Turn the leg warmer right side out so the seams are no longer showing.
      13. Repeat the steps above for the second leg warmer.

      **Note: To make these for a toddler, use 14 pegs and knit a total of rows. 

      Skinny Fur Scarf

      Knifty Knitter Fun Fur Scarf

      Skinny scarf made with eyelash yarn, or fun fur, to give it a fuzzy appearance. Quick and easy scarf pattern for beginners.

      Skill: Beginner

      INSTRUCTIONS

      Step 1: Wrap every other peg on a 12 peg round loom.


      Step 2: Holding both the boucle yarn and fun fur yarn together as one, wrap the loom.


      Step 3: Wrap the pegs a second time and using a knitting hook, pull the bottom loops over the top loops and release them off the pegs toward the inside of the loom. You've knitted your first row!

      Step 4: Continue wrapping a row and knitting until your scarf reaches the desired length or until you have run out of yarn. Three feet or more is a typical length for this scarf.


      Step 5: Cut your working yarn a foot from the end of the project. Thread this tail on a yarn needle and sew through each of the six loops remaining on the loom, lifting the loop off the pegs as you sew through it. Pull up tight and tie off.


      Step 6: Thread the starting yarn on the needle and sew up the beginning side of the project.


      Knifty Knitter Scarf- Skinny and Fun Fur

      Ribbon Woven Scarf on a Loom


      Instructions
      1. Holding 2 strands of yarn together as one, e wrap the first 2 pegs and skip the next peg, then wrap the next peg.
      2. Continue on around the loom, wrapping every other peg to the last 2 pegs.
      3. Wrap the last 2 pegs and knit, using the pegs wrapped and missing the pegs that are in between.
      4. Knit until your scarf is 3 feet long or your desired length.
      5. Using a yarn needle, or your fingers, weave 2 strands of ribbon through each of the bars in the knitting. These are the gaps or open spaces caused by the skipped pegs. Leave a few inches of ribbon fringe on each end. Knot the ribbon at each end where the scarf ends.


      Small round loom 


      Hook
      Yarn needle
      Other Supplies
      • One skein of Micro Spun from Lion Brand Yarn (French Vanilla)
      • One skein of Incredible Ribbon yarn from Lion Brand Yarn (City Lights)

      Friday, December 22, 2017

      Garage from a Milk Jug

      Materials Needed:
    • Plastic 1-gallon milk jug
    • Craft knife
    • Construction paper
    • Black marker
    • Toothpick
    • Cardboard
    • Thread spool


      Milk Jug CraftFirst, cut a 3 1/2-inch-square garage door opening in one of the container's flat sides with a craft knife. Glue construction paper roof shingles around the top of the jug. Next, add a business sign, made out of construction paper and hung on a toothpick. Poke the toothpick into the jug just above the garage door.

      To make a floor, set the jug on a piece of cardboard and trace around the base. Trim the edges so it will slide easily through the doorway. Decorate by gluing on construction paper tiles.

      Glue on a construction paper fuel pump and air hose by poking a hole in the side of the jug and tying on a piece of string. A thread-spool car lift finishes of the interior.
    • Wednesday, September 10, 2014

      How to Reuse Dryer Lint


      Who would have thought that the icky fuzz we clean from our dryer trap could be reused? Help your planet by eliminating waste.

      Instructions

      Difficulty: Easy

      Things You’ll Need:

      • Dryer Lint
      Step1
      Save the dryer lint. Keep a small box or bag near your dryer for storing the lint until it is reused.
       
      Step2
      Reuse lint to start fires. Stuff an empty paper egg cartons with lint. Stuff it full and close the lid. Make a hole in each "egg" at the bottom of the carton. Pour melted candle wax in each hole. Let this dry until the was is hard (2-3 hours). You can use these for kindling, as you would newspaper, but they work much better.
       
      Step3
      Reuse lint as mulch. If you were natural fibers such cotton and linen, dryer lint makes a great mulch. I would not put lint from synthetic fabrics into my organic garden. Just make a donut of lint around your tiny plant. Don't get it right against the plant, as mulch should not touch the stem of the plant. This promotes fungus and root rot. You can use lint alone or in combination with other materials reused for mulch.
       
      Step4
      Reuse lint as clay. You can actually make clay out of dryer lint. Put 1 1/2 C of dryer lint in a sauce pan. Add 1 C water. Add 1/2 C of flour and stir until smooth. Add 2 drops of vegetable oil or essential oils. Cook over low heat stirring constantly until it forms peak and has a solid consistency. Place on newspaper to cool. You may use it for molding as you would any clay then allow to dry for 3 days. You can paint it to add pizzazz.

      Tuesday, February 18, 2014

      Tutorial for Making Fabric Roses


      Reuse and Recycle Your Old Denim Jeans to Make Fabric Flowers

      this lens' photo
      This craft is so simple, that you can literally make a dozen roses in 1/2 an hour. Not to mention that it is a great way to reuse those old denim jeans with holes in the knees. All you need to get started is a pair of scissors, a pair of old jeans, and some tacky glue.


      Step 1: Cut the Hem Off the Jeans

      Tutorial for Making Fabric Roses


      Cutting the Fabric to Make a Fabric RoseCut the fabric approximately 1 inch above the hem of your pants. Cutting more fabric allows you to grasp it better as you wrap the rose, but you end up with a lot of bulky fabric behind your rose. I prefer to cut only and inch so that the back of the rose isn't bulky.

      This is the perfect way to use a cuff that is cut off while hemming a new pair of pants, or you may just be finding ways to reuse old denim jean. The great thing about using the cuff of pants, or jeans, is that the edge is already finished for you. You can run the unfinished edge that you just cut through a serger if you wish, but it's not necessary.


      Step 2: Run a Bead of Tacky Glue

      Tutorial for Making Fabric Roses


      Gluing Fabric Roses Run a bead of glue along the newly cut edge of your fabric. This holds the flower in place as you wrap it.


      Step 3: Roll, or Wrap, the Denim Loosely

      Tutorial for Making a Fabric Rose


      Making a Denim Fabric Rose from Old Blue JeansWrap the rose, beginning with the inner seam of the pant leg on the inside of the flower. It looks like the center of the flower when finished. Wrap loosely to make the rose appear as if it is opening. The tacky glue will help to hold the fabric in place as you wrap. You can also stitch, sew, or pin the base of the rose when finished to help secure it. I like to pin mine until the glue finishes drying.


      Step 4: Put Your Finished Fabric Roses to Good Use!

      Decorate Your World with Your Fabric Flowers


      Fabric Denim Rose TutorialGet creative with your fabric flowers. Here are some ideas:
      1. Make a fabric flower potpourri (add a little essential oil for fragrance)
      2. Add a stem and place the denim flowers in a vase
      3. Embellish your craft and sewing projects with fabric flowers.


      Fabric Flowers


      Saturday, January 28, 2012

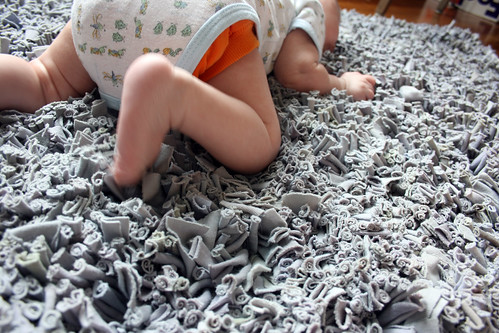
      How to Reuse TShirts to Make a Latch Hook Rug

      If you enjoy finding ways to reuse household items, rather than throwing them away, this recycled tshirt rug is for you. Much like latch hook kits you find in the store, you can make a latch hook rug from old t-shirts with canvas, a latch hook tool and old tshirts. Tshirts that are in good condition are best put to use by donating them, or giving them to someone that can wear them, but for tshirts with holes, or that are no longer wearable, why not make this tshirt rug?
      You will need:
      • hook rug canvas - 2' x 3' is standard size for a rug, but you can make it any size you wish
      • tshirts to be reused
      • rotary cutter and mat
      • darning needle
      • string
      • latch hook


      Step 1: Prepare the TShirt

      Get the tshirt fabric ready by removing the seams and sleeves. All you want to have left is smooth fabric that can be cut into strips. Cut across the fabric to make sections that are 6 inches tall. Use a ruler to ensure you cut in a straight line. Most shirts will leave you with 2 or more sections that are 6 inches tall. Next, cut vertically, or down these sections to create strips that are 1/2 an inch wide. You may be able to stack the sections and cut through more than one layer at a time, depending on the sharpness of your blade.


      Make the Latch Hook Rug

      Before you begin hooking your scraps of fabric, you may wish draw a pattern on the canvas to help you know when to change colors. For example, you could draw a simple smiley face, a heart, or rows where you wish your color to change if you are making a multicolored latch hook rug.

      Feed the latch hook tool up through under the first canvas string and back up over the top of it. The tip of the hook should be resting back on top. Wrap the tshirt strip under the bottom of the tool. Holding the ends of the tshirt strip together with your non-dominant hand as you hold the hook tool with the dominant hand. Bring the ends of the strip to the tip of the tool and over the hook. After hooking them, pull them through the canvas with the tool and tie them in a knot.


      Securing the Edges of the Rug

      When you are finished hooking the strips of tshirt to form the rug, fold the edges under and sew them to the back side of the rug. This prevents them from fraying. You could also tape them to the underside of the rug, if you prefer it to sewing.
      If you liked this article, you may want to visit more crafty "Ways to Reuse and Recycle Clothes."


      How to Make a Recycled Denim Bag by Repurposing Children's Overalls

      Supplies Needed:
      • Children's overalls (A favorite pair of outgrown overalls from your own children, or thrift store finds)
      • Tacky glue
      • Red t-shirt
      • Sewing machine or serging machine

      Recycled Tote Bag Made from Children's Overalls

      Directions

      The size of overalls chosen will determine the finished size of the bag. Pockets on the overall add extra storage capacity to the finished bag also.overalls3
      1. Turn the overalls inside out.
      2. Cut the legs off, beginning above the crotch of the overalls. The goal is to have a straight raw edge across the bottom of the overalls.
      3. Sew across the bottom edge with a serging machine, or sewing machine. If you are using a sewing machine, stitch with a zig-zag stitch to strengthen the bottom seam. If the pockets of the overalls were cut, be sure they are sewn shut at the bottom as you sew the seam, so that they may be used as storage also.
      4. Cut a t-shirt to fill in the side gaps of the overalls just below where the arms would be if someone were wearing them. Do this by measuring the open gap between the front and back of the overalls on each side. Cut two pieces of t-shirt material wide and long enough to fill in the gap on the side of the overalls.
      5. Using a sewing machine or serger, finish any raw edges of the t-shirt.overalls1
      6. Glue the t-shirt to the inside of the overalls with the wrong side of the t-shirt facing up.The right side of the t-shirt should be facing the inside, as this is the side that will show when the bag is finished.
      7. Set the bag aside to dry overnight.
      8. When the glue is dry, turn the bag right side out and it is ready to use immediately.
      9. You can embellish the outside of your new totebag with rhinestones, fabric paint, buttons and other objects if you wish.
      10. Take your new recycled tote bag with you when you shop or run errands to help transport your items, or use it to store and organize craft supplies, sewing supplies, toys, or other household items.
      If you enjoyed learning how to make a recycled denim bag, you might also enjoy other denim crafts. Old jeans and overalls can be reused in many ways. In addition to this tote bag, you can make pocket potholders, denim roses, photo album covers, storage units for the wall, quilts, rugs, and lots of other crafts. Jeans have so many ways to be repurposed. For many more ideas, see "How to Reuse or Recycle Denim." Recycled craft ideas to repurpose other discarded items around the home, such as plastic, toilet paper rolls, soup cans and milk jugs, can be found at: "Reuse It All - Waste Zero."

      Credits

      Photos by HS Schulte.

      Saturday, October 22, 2011

      Tuesday, July 19, 2011

      Clothes as Craft Materials

      Have you ever thought of repurposing your old clothes as craft materials? Over the last 100 years, clothing has become so cheap and easy to create that it is being purchased and discarded at an alarming rate. Give your old clothes to those in need, rather than throwing them out. If they have holes or are torn, put them to use as craft material. I've spent several years collecting ideas for crafts from clothes. You can find these ideas with photos of the finished projects.

      Herbal Honey Recipes

      Herbal honey can be used to treat common ailments or simply for the pleasure of its wonderful flavor. If you enjoy herbs and honey...